How to draw a beautiful red Queen drawing- Easily guide in 8 steps.
I draw a red queen drawing in an easy way. I guide you in every step. take your pencil and follow these steps. so, let’s start our drawing.
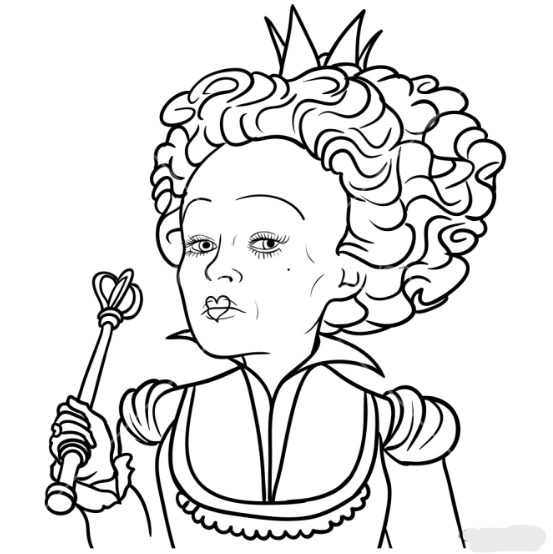
Draw the basic shape of the face of the red queen drawing:
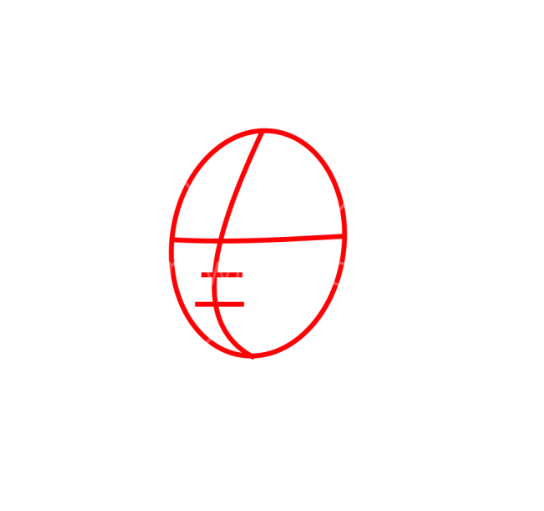
Start by lightly sketching the basic shapes to outline the Red Queen’s face. Use simple shapes like circles and ovals to make the proportions and pose. Refine the shape of the face.
Draw the eyes and nose of the red queen drawing:
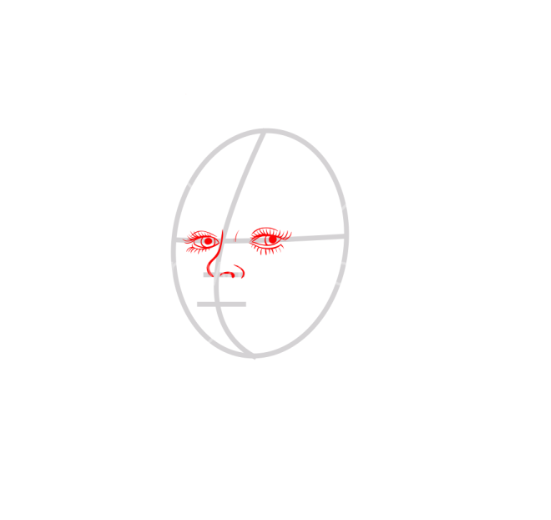
Start by outlining the eyes. The Red Queen usually has narrow, piercing eyes with slightly arched eyebrows.
- Eyes:
- Draw two oval shapes for the eyes, slightly slanted downwards towards the outer corners.
- Draw the eyelids above and below the eyes. The eyelids should follow the shape of the eyes and can be slightly thicker towards the outer corners.
- Add eyelashes along the upper eyelid to point(up) the Red Queen’s dramatic look.
- Nose:
- Draw the nose down the eyes.
- The Red Queen’s nose is usually thin and pointed.
- Connect the nose to the rest of the face by drawing the sides of the nose, which should taper down towards the mouth.
- Start with a small curved line for the tip of the nose, then add one nostril on moreover side with a tiny oval or circle.
Draw the heart shape lips of the red queen drawing:
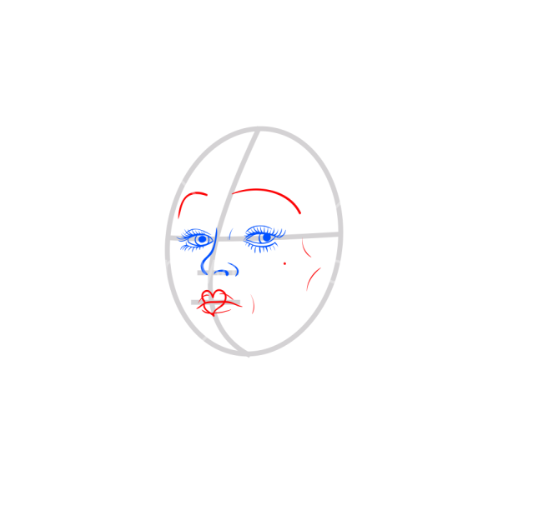
- Start by outlining the upper lip. Begin at the center of the mouth.
- Draw a curved line that increases outward on both sides, curving slightly upward at the corners to create the heart shape.
- Outline the lower lip. Mirror the shape of the upper lip, drawing a curved line that meets at the center and extends outward, curving upward at the corners to complete the heart shape.
- Connect the upper and lower lips by drawing a curved line in the center where they meet.
- Draw two curved lines upper the eyes for eyebrows.
Make the hairs of the red queen drawing:
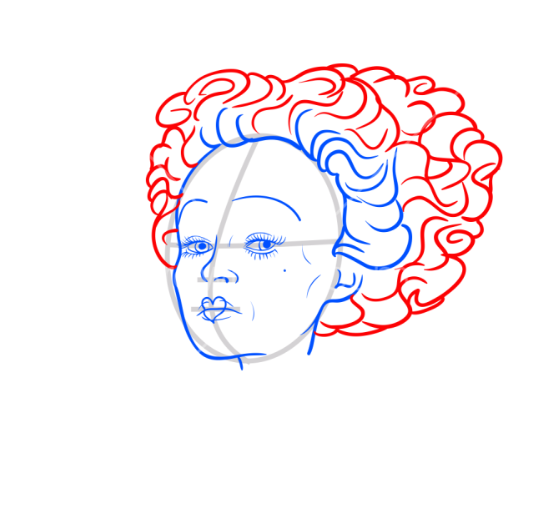
- Start by outlining the basic shape of the hair. Sattle the direction in which you want the curls to flow. The red queen drawing often has big, curly hair rolling from under her crown.
- Begin adding individual curls to the hair. Start from the top and work your way down, drawing small, rounded shapes to represent the curls. different the size and direction of the curls to create a natural-looking texture.
- Add more curls, and increase them slightly to give the hair depth and volume. Please focus on the shape of the curls, making them larger and more exaggerated towards the bottom of the hair.
- Use short, curved lines to add detail and texture to the curls. This will make the hair look more realistic and effective
Outline the crown of the red queen drawing:
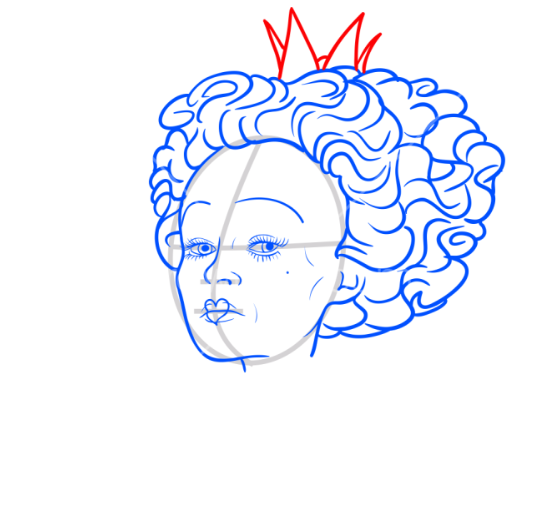
- Sketch the Basic Shape of a crown.
- Start by drawing a horizontal line across your paper to represent the base of the crown.
- Then, lightly sketch the outline of the crown’s main structure.
- This can include tall points, with a central peak for added greatness.
- Draw the points and increase the points of the crown upwards from the base.
- These can be sharp and pointed.
- Make sure they are evenly spaced and equal for a balanced look.
- So, feel free to get creative with the design.
Draw the clothes of the red queen drawing:
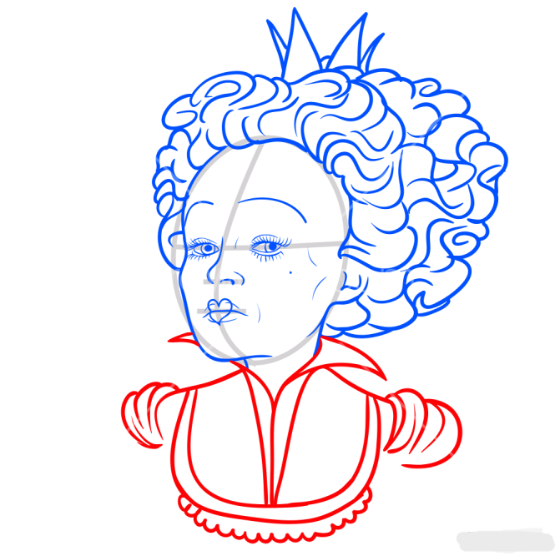
- Outline the red queen clothes.
- Begin by sketching the basic outline of the Red Queen’s clothes.
- Consider the pose and stance of the character, as it will affect how the clothing drapes and flows.
- Start by drawing the neck design of the dress.
- The Red Queen’s neck design is typically fitted and adorned with elaborate details such as lace, ruffles, or intricate patterns. Sketch the neckline and sleeves.
- Draw the sleeves of the gown, which can be short and billowy or fitted with puffy shoulders.
- Add any decorative elements such as lace cuffs, ribbons, or jeweled accents to enhance the overall look.
Draw the magic wand of the red queen drawing:
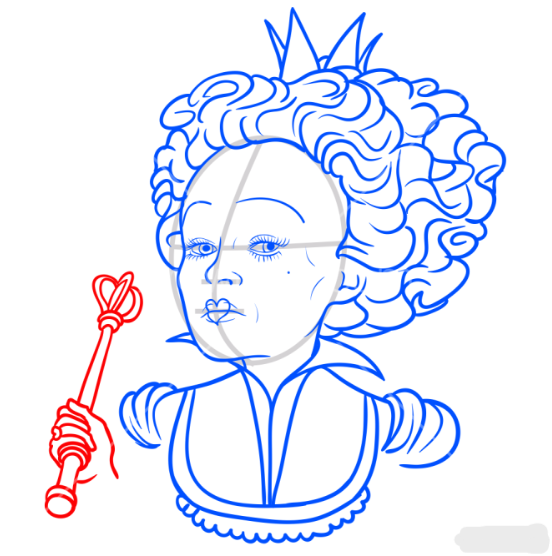
- Sketch the Wand Handle. Start by drawing the handle of the wand.
- The handle is typically long and slender, often resembling a scepter.
- Sketch a straight or slightly curved line to represent the main shaft of the wand.
- Draw the Wand Tip. At the top of the handle, draw the tip of the wand.
- This can be a simple rounded shape or a more elaborate design, depending on your preference.
- Add Details to the Handle. Next, add details to the handle such as decorative elements, patterns, or jewels.
Draw the arms of the red queen drawing:
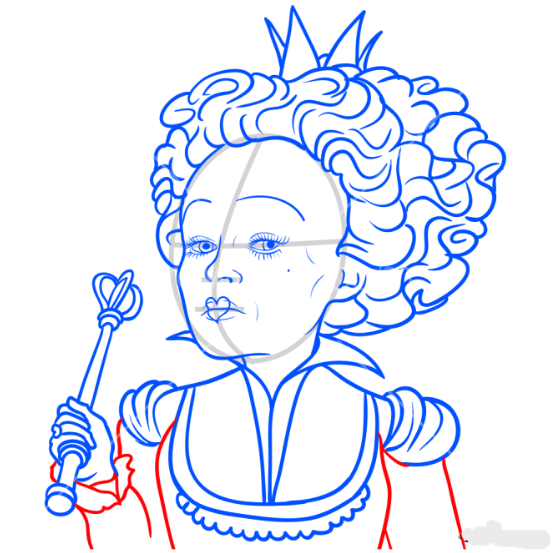
- Outline the arms. draw two curved lines to represent the arms.
- Arrange the lines to the arm shape.
- Connect the arms to the shoulder joint.
- Pay attention to the length and thickness of the arms, keeping them proportionate to the rest of the body.
Conclusion:
The Red Queen, a pivotal figure in Lewis Carroll’s “Through the Looking-Glass, and What Alice Found There,” embodies authority and dominance in the whimsical realm of Wonderland. With her imposing presence, she governs the chessboard world Alice encounters, enforcing rules that often appear arbitrary and capricious.
Known for her regal attire and commanding demeanor, the Red Queen symbolizes the relentless pursuit of power and the maintenance of the status quo, famously epitomized in her statement, “Now, here, you see, it takes all the running you can do, to keep in the same place.” Whether portrayed as a formidable antagonist or a captivating leader, the Red Queen is a timeless emblem of authority and the intricacies of hierarchy, leaving an indelible mark on literature and popular culture.