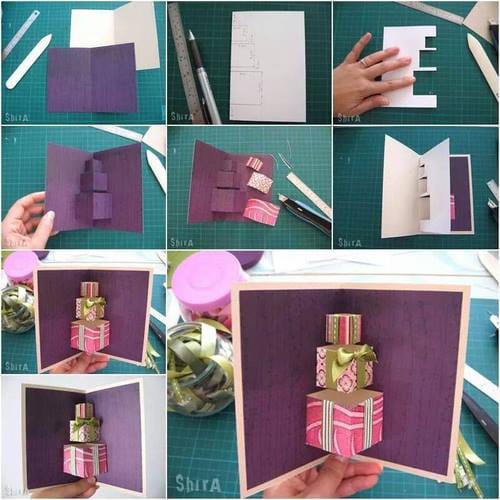
Attractive pull-tab birthday card made for beginners in 4 steps
Today I made a very creative and beautiful pull-tab birthday card. This one is a pull-tab birthday card letter folding origami with a secret message card inside.
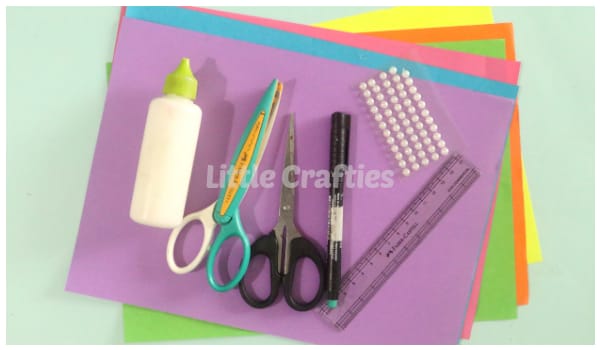
Materials Needed:
- Cardstock or thick paper for the card base
- Decorative paper or patterned paper
- Adhesive (glue stick, double-sided tape, or liquid glue)
- Scissors or paper trimmer
- Ruler
- Pencil
- Optional: Stickers, markers, or other embellishments for decoration
Prepare Your Materials for pull-tab Birthday Card:
Gather all the materials you need for the project. Choose the colors and patterns of paper you want to use for your pull-tab birthday card.
Step 1:
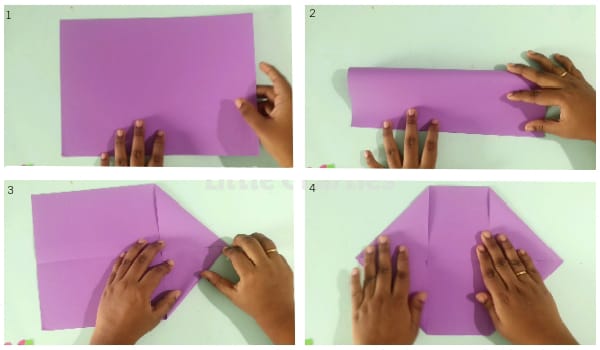
- Take your thick paper and cut it to the desired size for your pull-tab birthday card. You can make it any size you like, but it is typically around 5×7 inches.
- Fold the paper in the center and press for the mark.
- Take your pull-tab birthday card base and fold these corners diagonally toward the center of the card.
- The same procedure was repeated on the second side. Press down firmly along the folded edges to create sharp creases. Ensure that the folds are crisp and secure.
Step 2:
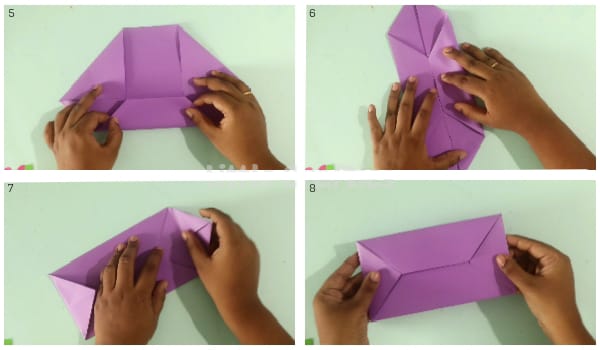
- As you can see in the picture. we fold the right side of the paper.
- Then we will repeat this process on the second side of the pull tab birthday card.
- Fold both corners of the pull tab birthday card and press the full card lightly again.
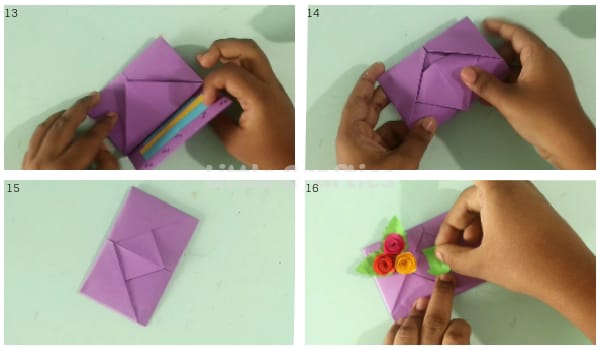
Step 3:
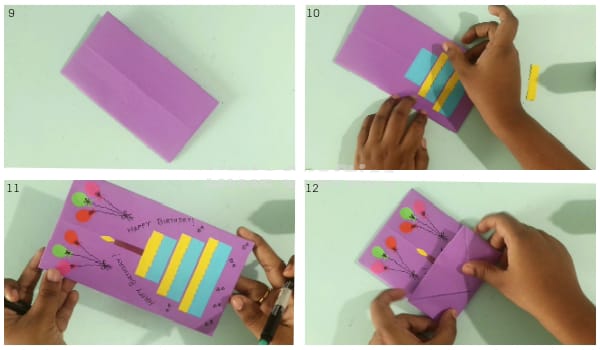
- Then, on the left side of the card, we add decorative elements for the pull-tab birthday card.
- Cut a piece of decorative paper or patterned paper slightly smaller than the card base.
- Images of birthday cake are perfect for birthday-themed projects. Look for papers featuring delicious cake illustrations or patterns with sprinkles.
- Birthday candles are often associated with making a wish. Look for papers with patterns of candles in various sizes and colors, arranged in a fun and creative ways and cut.
- Balloons are a classic symbol of birthdays and can come in a variety of colors and styles. Look for papers with balloon motifs in vibrant colors like red, blue, yellow, and green and cut.
- Paste all decorative elements on a birthday card.
Step 4:
- Cut out a rectangle from another piece of cardstock or paper that will serve as the pull-tab birthday card.
- The size of this rectangle will depend on how big you want the pull tab to be.
- Attach the Pull-Tab: Place the pull tab on the card base where you want it to be located.
- Make sure to leave enough space at the top or side for the recipient to easily grab onto it.
- Now, attach your pull tab to the folded corners.
- You can use adhesive to secure it in place.
- Make sure the pull tab can move freely between the folded corners.
Test the Pull-Tab birthday card:
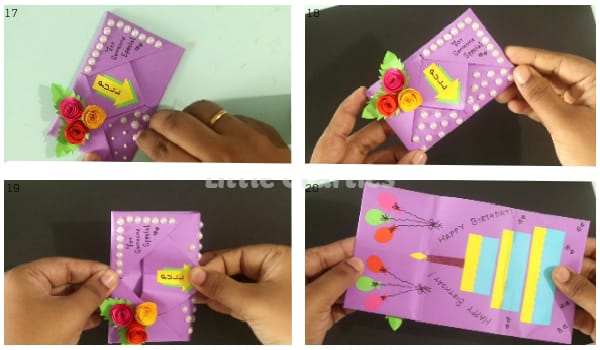
Slide the pull tab into the slot and test it to make sure it moves smoothly. Adjust the size of the slot if necessary to ensure a proper fit. Decorate the pull-tab birthday card with decorative paper, stickers, or markers. You can also write a message or draw a design on it if you’d like.
Add details as you want on a pull-tab birthday card:
When selecting decorative paper patterns for a birthday-themed project, consider designs that evoke joy and celebration. Balloon motifs in vibrant colors like red, blue, yellow, and green, along with confetti designs in bright and cheerful colors, add festive flair. Additionally, patterns featuring birthday cakes, cupcakes with sprinkles, and party hats bring a playful and whimsical touch.
Candle patterns symbolize making a wish, while banners, bunting, and polka dots create a lively atmosphere. Stripes offer a classic yet vibrant look, and rainbow designs embody happiness. For children’s projects, incorporating favorite cartoon characters or superheroes can add a personal touch. By choosing decorative paper patterns aligned with the recipient’s preferences and the celebration’s theme, you can create a memorable and joyous pull-tab birthday card.