How to draw wonderful house pencil sketch for beginners guide step by step:
Today I draw a magical fairy house pencil sketch that captures the imagination and delights the brain.lets take a pencil and start the fairy house with a pencil sketch.
Material:
Sketchbook
Pencil
Raise
Shop
Scale
Blender
Step 1: Basic Structure of house pencil sketch:

Start by drawing the outline of the fairy house pencil sketch. You can choose any shape you like, such as a tree stump, a mushroom, or a cosy cottage. Sketch the triangular shape for the roof.
Step 2:
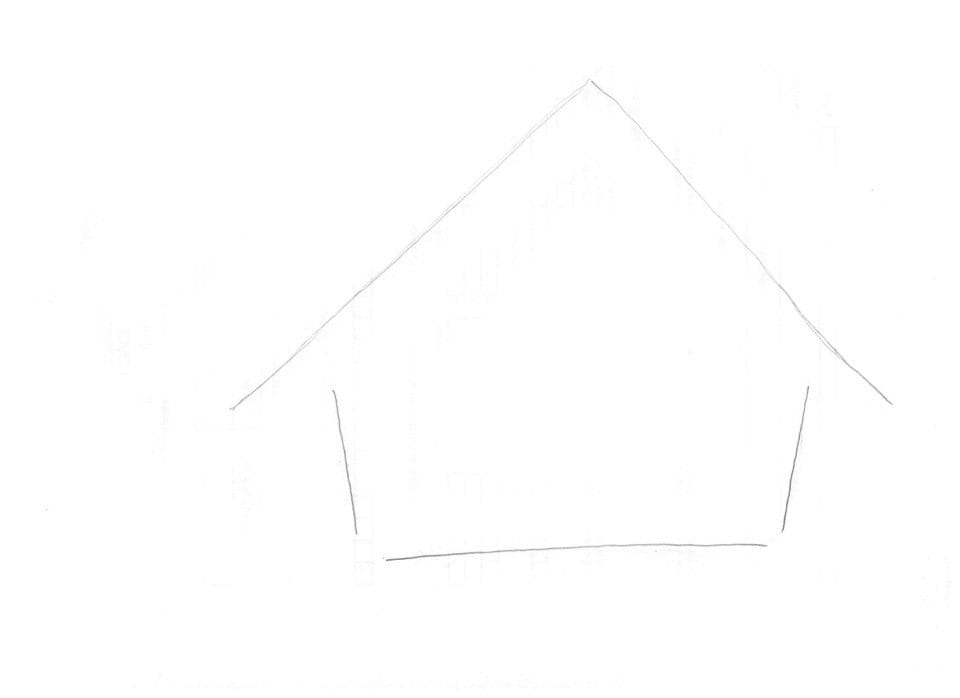
Draw the edges of the walls and base. Let it be unbalanced, it’s even better, because we draw an awesome house pencil sketch.
Step 3:
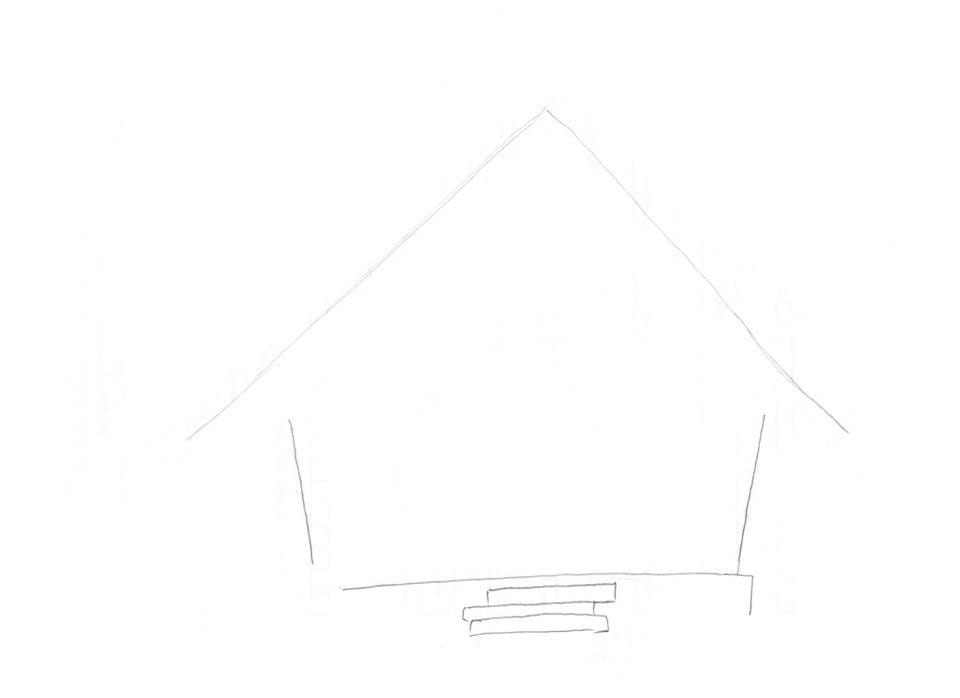
Let’s draw the stair of steps
Step 4:
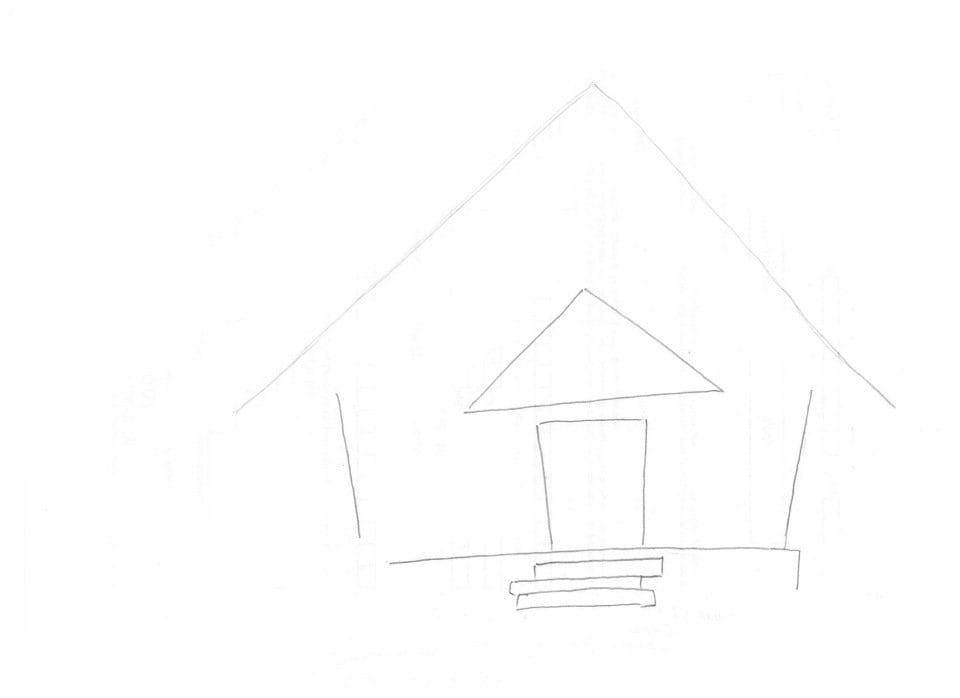
draw the front door of the house in rectangle shape, draw the triangle shape above the front door as a small window.
Step 5:
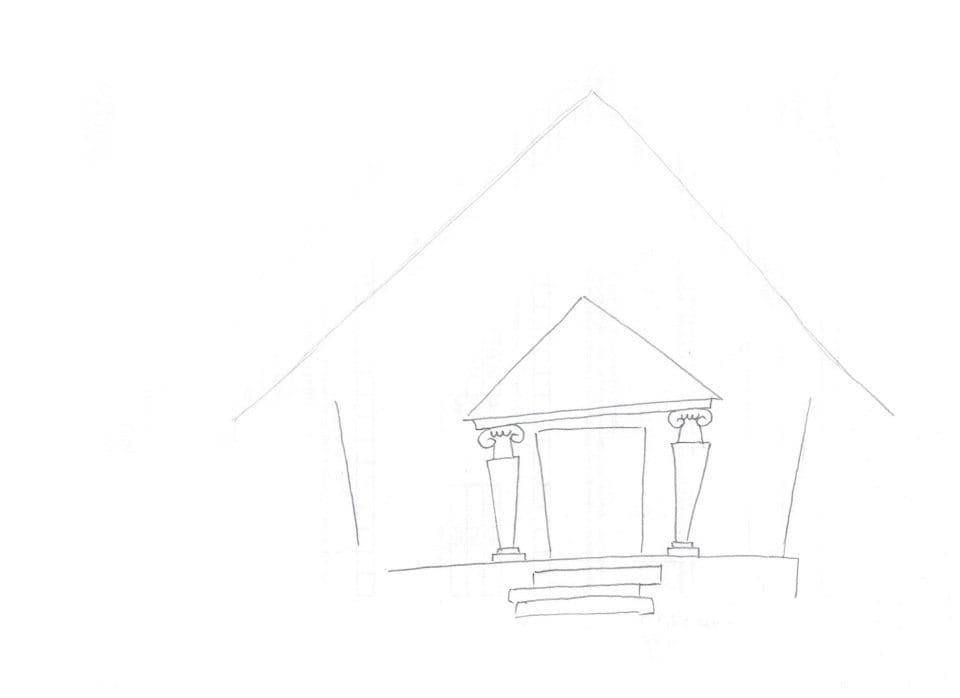
Begin by drawing the basic shape of the pillars. They can be cylindrical, square, or tapered, depending on the architectural style you envision for the fairy house.
Consider carving intricate designs or patterns into the surface of the pillars, reminiscent of fairy tale designs like vines, flowers.
Step 6:
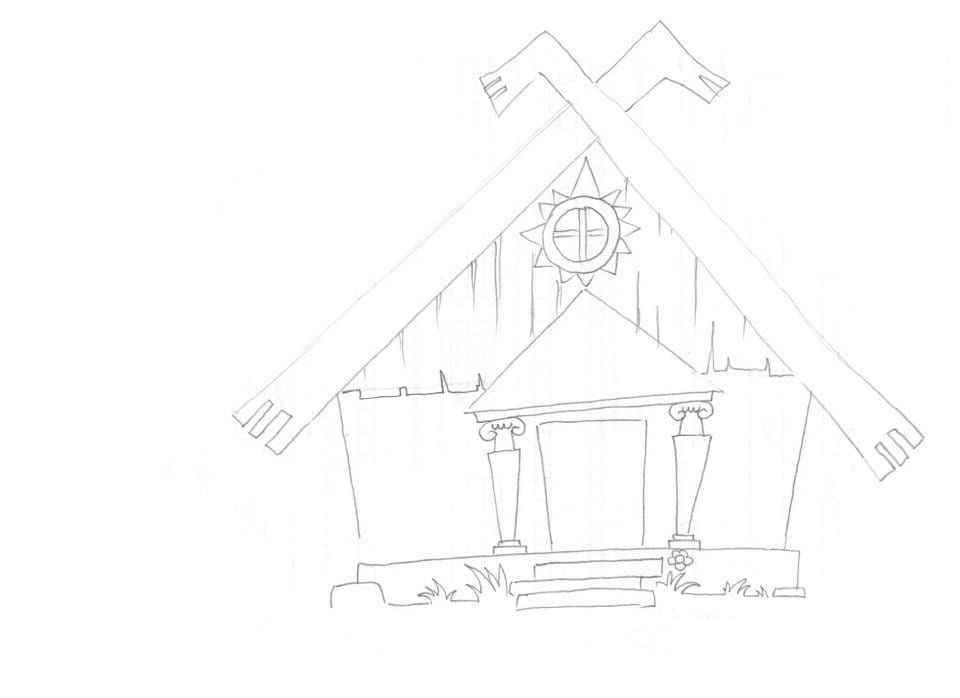
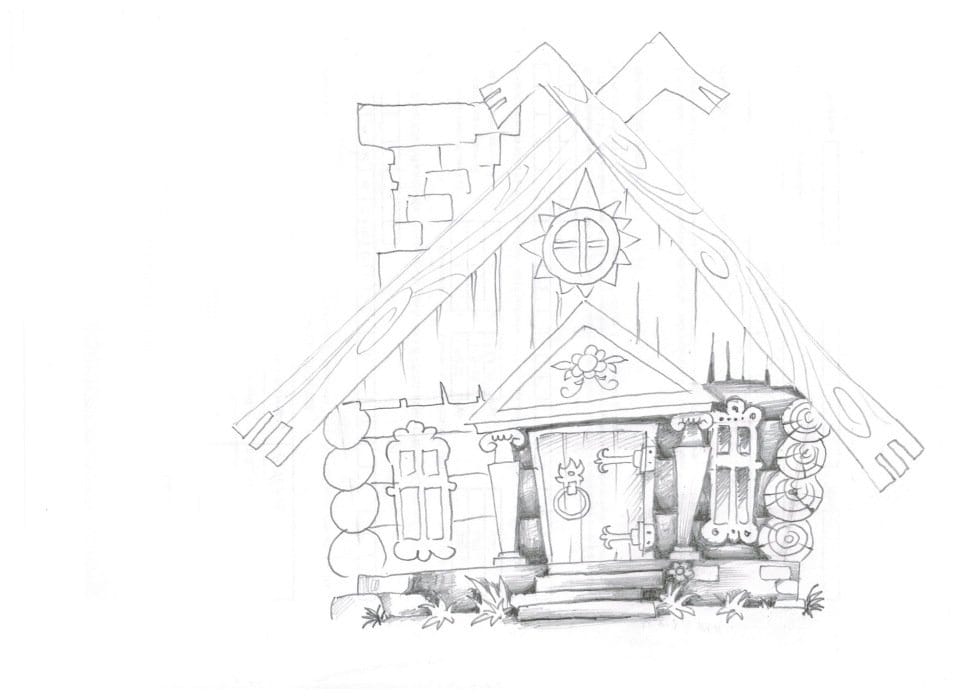
The roof of the house has this interesting decor. The edge of the roof draws the shape of ice hockey sticky and the sun shaped window draws little triangles around the window, drawing another inner circle and dividing it in four parts.
Step 7:

A whimsical chimney protrudes from the side of the roof, emitting a gentle wisp of smoke,
adding to the cozy ambiance.
Step 8:Add more details:
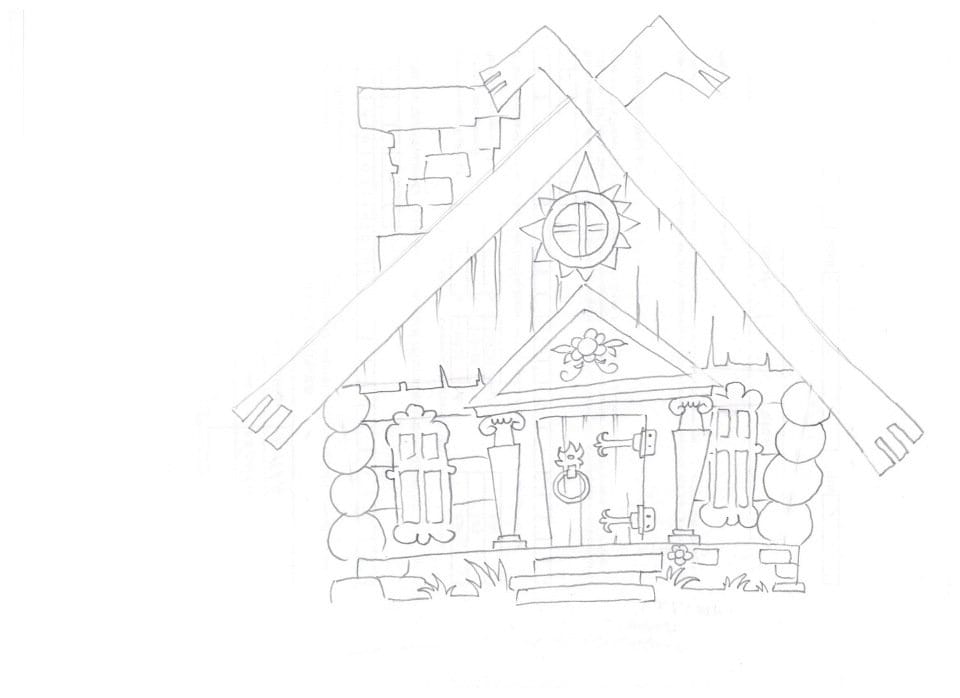
In the next stage, I propose to draw a pipe with bricks, the Windows on each side of the entrance, and a flower in the triangle porch.
Then draw the hinges and the handle on the front door. Make the edges of logs, because the frame of our house is made of them. It is possible to draw some grass at the entrance and mark on the base stones.
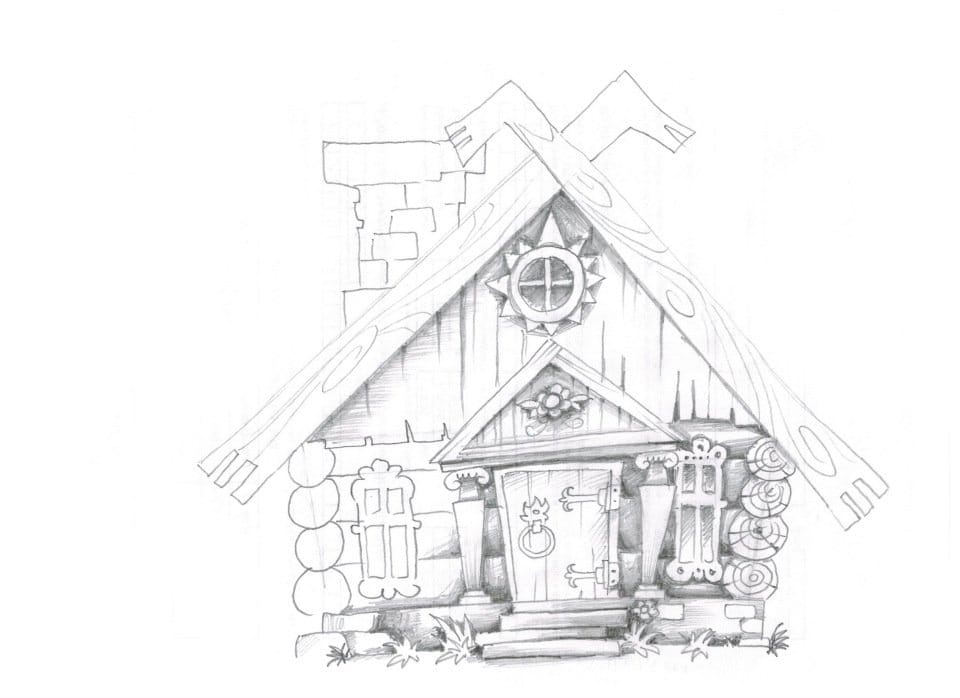
Step 9: Decorative Accents
Incorporate decorative accents to embellish the pillars further. This could include adding bands of decorative trim, carved reliefs, or hanging lanterns. These details not only add visual interest but also contribute to the whimsical and magical atmosphere of the fairy house.
Step 10: house pencil sketch of shading:
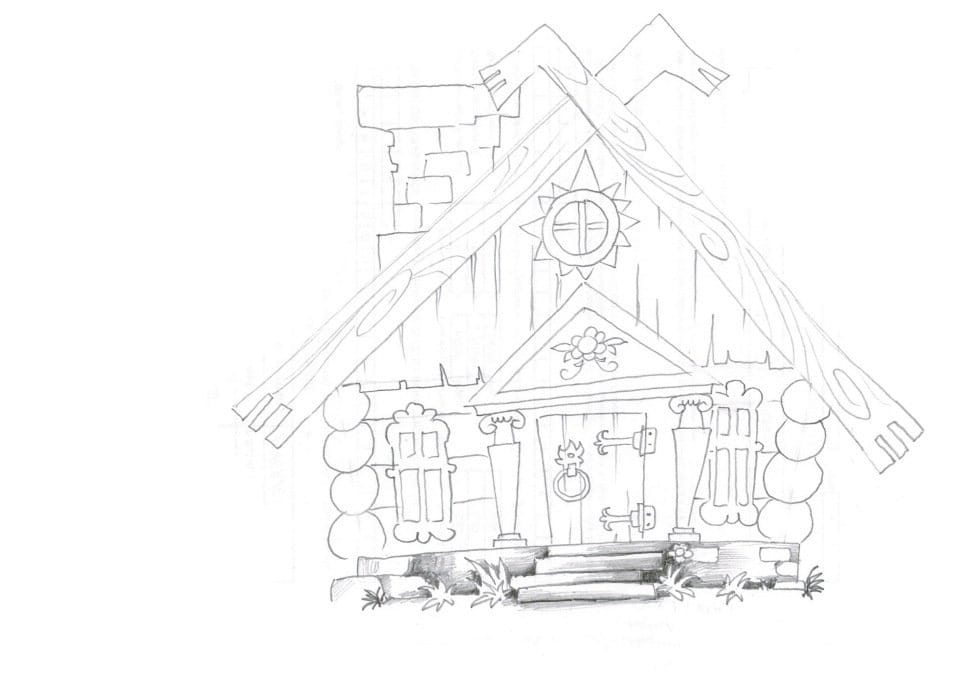
Then I plan to show the size of the house. I decided to start from the bottom.
see, the closer the shadow to the elements of a porch and land.
Remember about shadows and sealing them into the deep “folds”
Continue stroking the other elements of the house. See, already at this stage it looks almost alive.
For more realism I propose to add wood veins on the elements of the house pencil sketch.
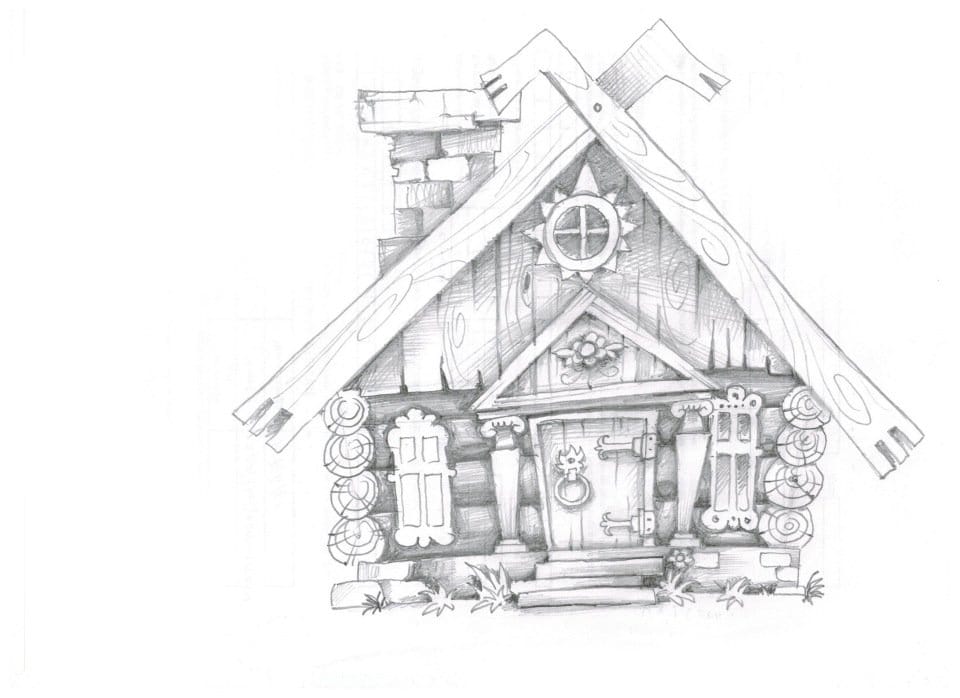
Do not forget about the roof and the pipe. I will light shading in the pipe and roof.
Add a fence and trees. Display little shady corners.
Step 11:final touch house pencil sketch:
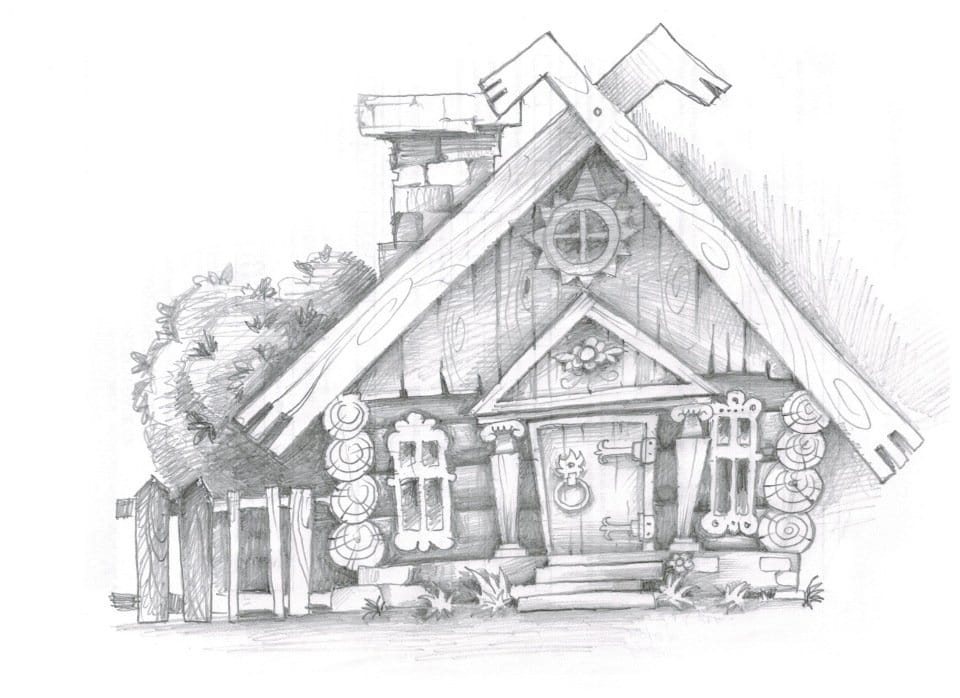
Add any final touches or refinements to the fairy house to complete the sketch. Take a step back and assess the overall composition, making adjustments as needed to ensure visual balance and understanding with the rest of the fairy house.That’s all. Fabulous house ready!
Summarised:
The cottage fairy house is a charming dwelling nestled in an enchanted forest. It features a quaint rectangular structure with a triangular roof, adorned with intricate details like arched doorways, small windows with shutters, and a chimney emitting a wisp of smoke.Moss and climbing vines cover the walls, while a tiny porch with a swing invites fairies to relax and enjoy the scenery. Overall, the cottage fairy house releases a sense of warmth and magic, inviting visitors to step into a world of wonder and imagination. When you make a sketch, take care of the light.