How To Draw Glorious Flowers Drawing with Pencil is Easy step-by-step for beginners.
Learn how to draw simple flowers drawing with these step-by-step guides made for beginners. Follow these steps and make different types of pretty flowers.
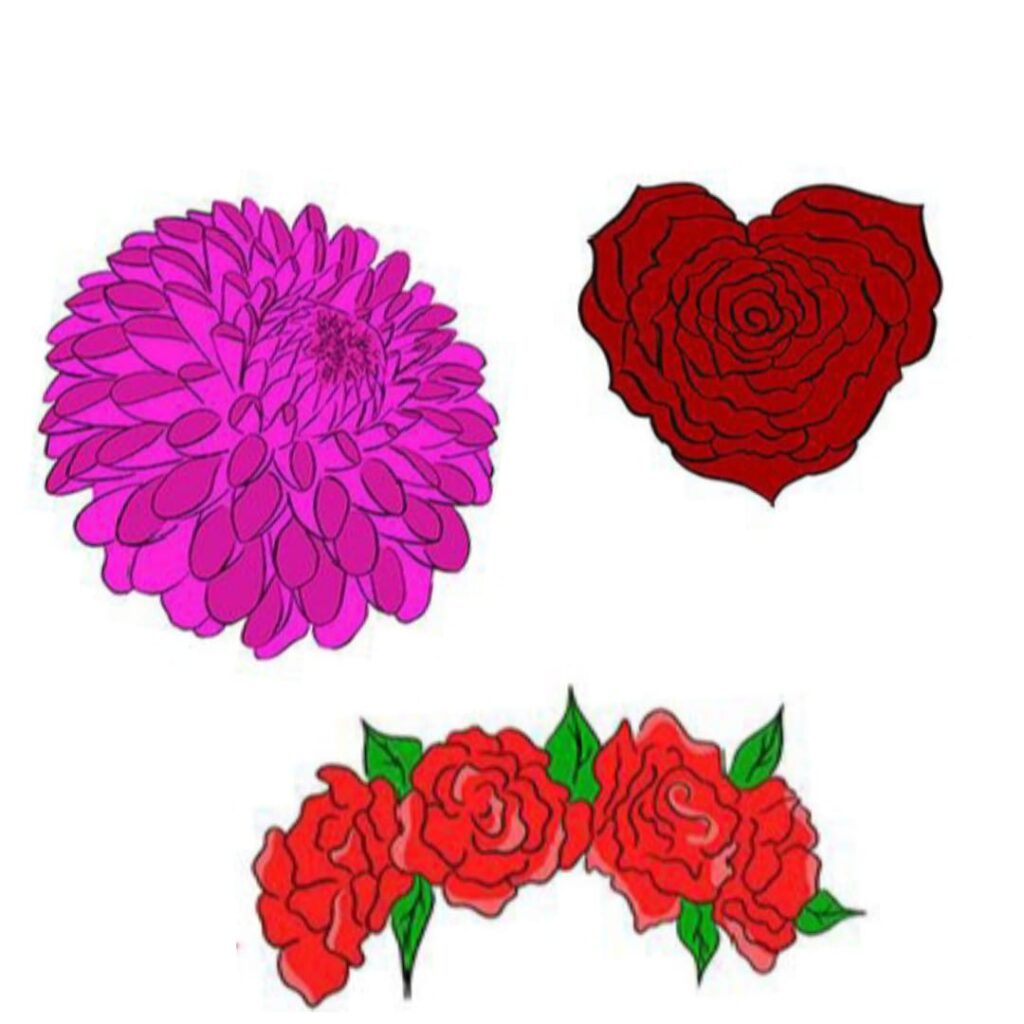
Drawing a dahlia flowers drawing can be an ecstatic process. Here’s a step-by-step guide to help you draw a detailed dahlia flower.
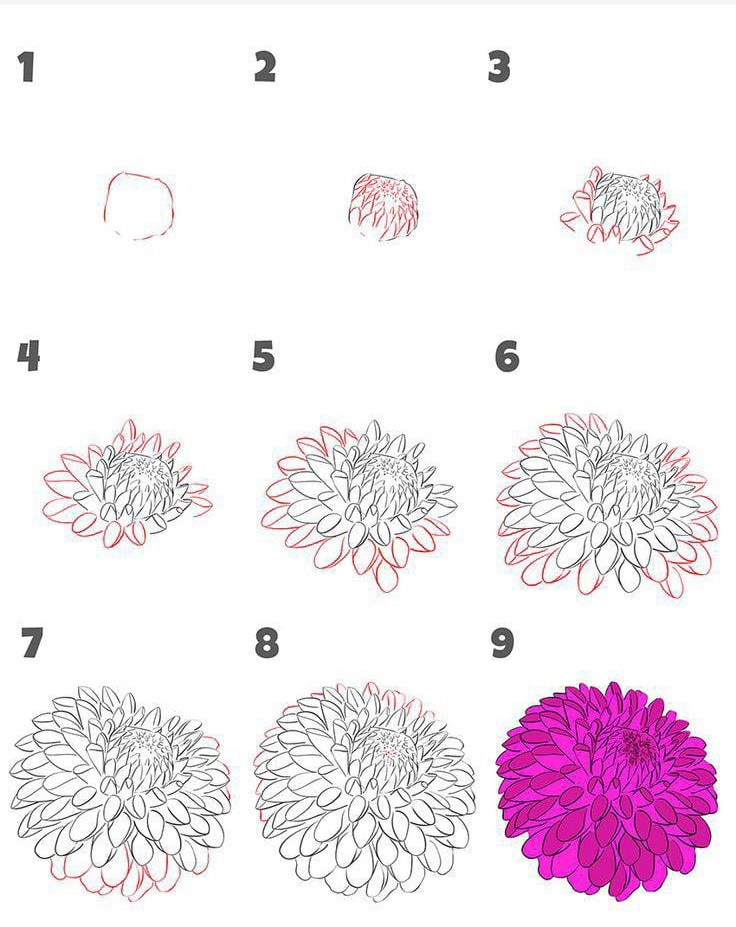
Step 1:
Sketch the Basic Shape: Start by sketching a circle to represent the center of the dahlia flower. These petals should be shorter and narrower than the outer ones.
Step 2:
In the center of the flower, draw a cluster of tiny, tubular shapes radiating from the center. These represent the stamens of the dahlia flower.
Step 3:
Then, draw some oval shapes in the circle. These ovals will serve as guidelines for the petals.
Step4 :
Sketch the outlines of the petals around the circle. Dahlia petals are usually pointed and slightly curved. Draw them overlapping each other to create a natural look.
Step 5:
Refine the outline of each petal by adding gentle curves and indentations to mimic the texture of the petals. Pay attention to the edges, which may have a slightly serrated appearance.
Step 6:
Once you’re satisfied with the overall shape and details of the dahlia flower, erase any remaining guidelines or sketch lines.
Step 7:
Take a step back and assess your flowers drawing. Add any final touches or details you feel are necessary to complete the look of your dahlia flower.
Step 8:
If you’re using colored pencils or paints, carefully add color to your dahlia flower. Dahlia flowers drawing come in a variety of colors.
Creating a flower crown drawing is a lovely and creative activity. Below is a step-by-step guide to help you draw a flower crown.
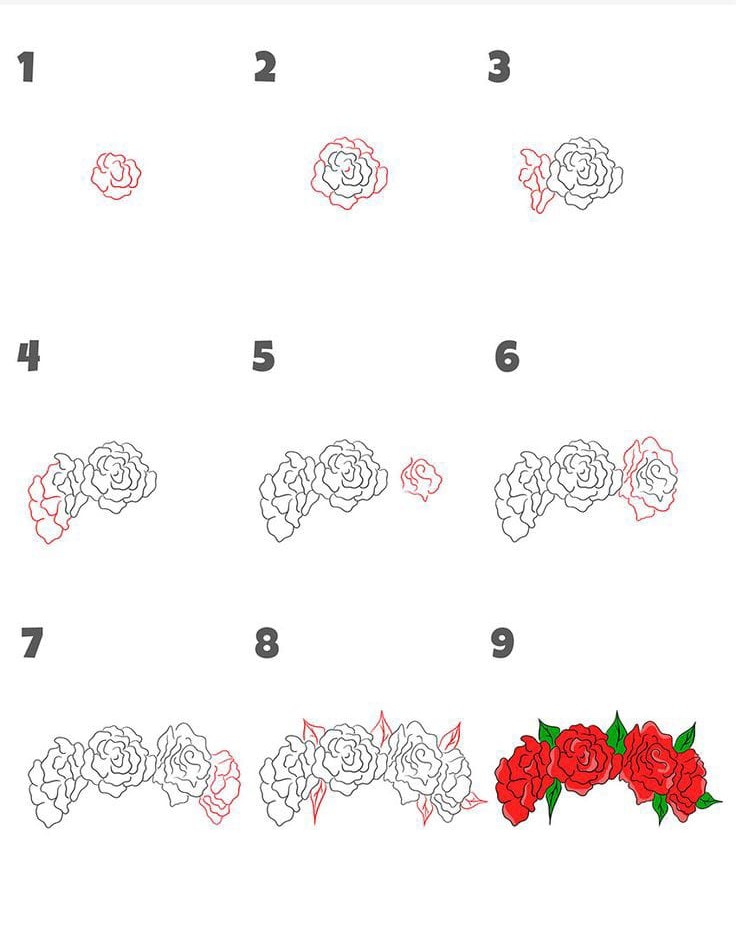
Step 1:
Start by drawing a simple curve or oval shape to represent the base of the crown. This will serve as a guideline for the size and shape of your flower crown. You can draw it horizontally or slightly curved upwards to mimic how a crown would sit on a head.
Step 2:
Draw three large flower shapes along the base of the crown. You can choose any flowers drawing you like; for this example, we’ll draw roses. Start with a small circle in the center of the bud and add overlapping petals around it.
Step 3:
Add details to the roses by drawing curved lines inside the petals to define their shape. You can also add small lines radiating from the center of the bud to represent the inner petals.
Step 4:
Sketch in some simple leaf shapes around the flowers. Draw elongated oval shapes with pointed tips to represent the leaves. Place them between and around the flowers to fill out the crown.
Step 5:
Refine your flower crown by adding more details and texture. You can add veins to the leaves and texture to the petals using short, curved lines. This will give your drawing depth and dimension.
Step 6:
If you wish, you can add color to your flower crown using colored pencils, markers, or any other coloring medium you prefer. Choose colors that complement each other and consider adding shading and highlights to make your flowers and leaves look more vibrant and realistic.
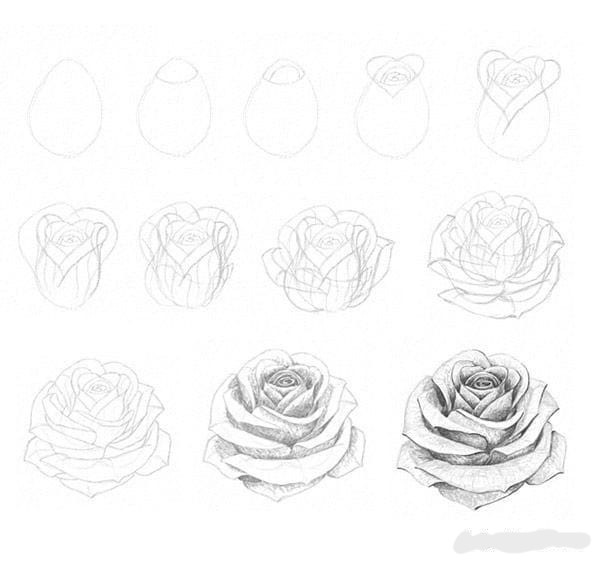
Drawing a heart-shaped rose drawing. Below is a step-by-step guide to help you draw a heart-shaped rose.
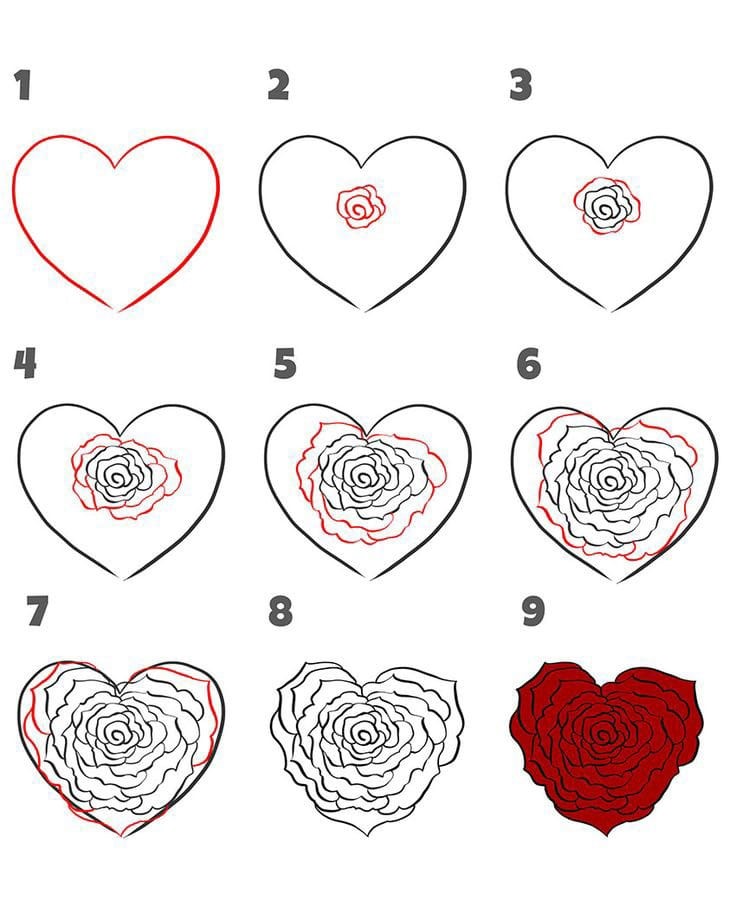
Step 1:
Begin by lightly sketching the outline of a heart shape on your paper. This will serve as the base for your rose. You can use a pencil for this step so that you can easily erase any mistakes.
Step 2:
draw two curves that extend outward and then curve back in to meet the sides of the heart. These curves should be smooth and symmetrical. then, this will make the heart shape.
Step 3:
Start drawing of the center the heart and make the inner petals of the rose by making small curved lines around the top of the heart shape. These lines should curve inward slightly towards the center of the heart.
Step 4:
Continue adding more petals around the heart shape, gradually increasing the size of the petals as you move outward. Make sure to vary the sizes and shapes of the petals to give your rose a more natural look.
Step 5:
Once you have added all the petals, go back and define the edges of each petal by darkening the lines. You can also add some small details to the petals, such as ridges or folds, to make them look more realistic.
Step 6:
Finally, add any additional details to your flowers drawing, such as shading to give the rose more dimension or highlights to make it look more realistic. You can also erase any remaining pencil lines from the initial sketch.
Step 7:
Use a red colored pencil, marker, or crayon to fill in the inside of the heart-shaped rose. Start from the edges and work your way towards the center.